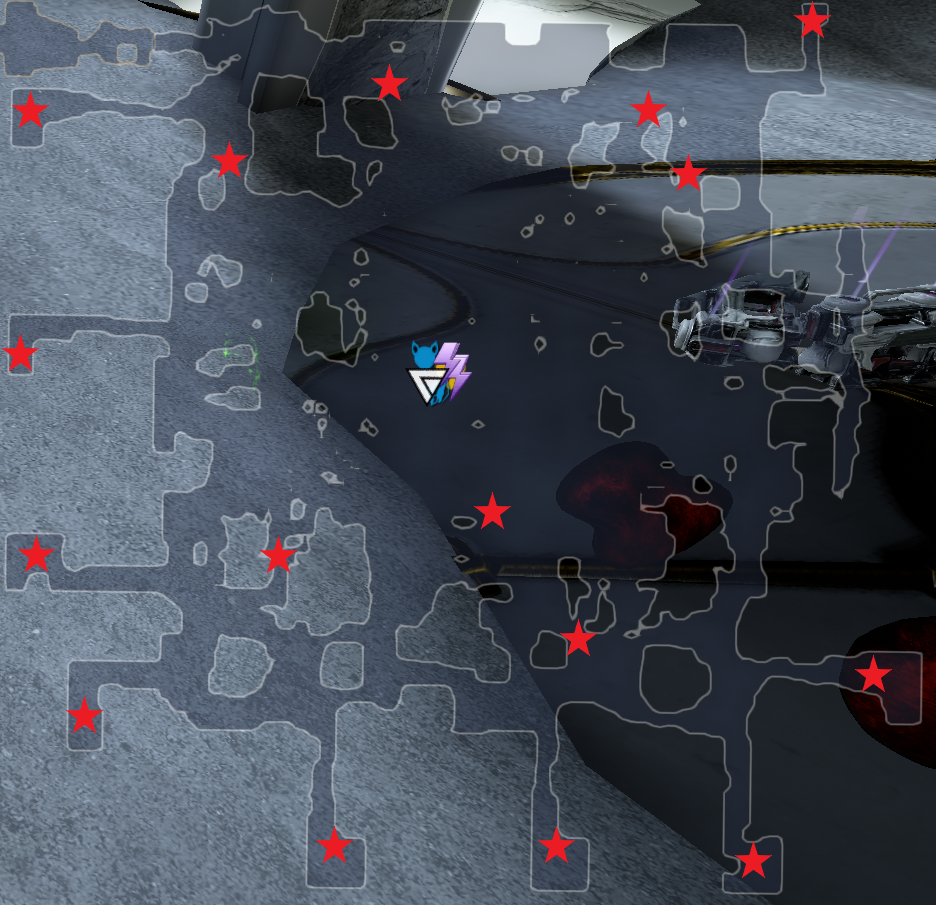
Hyf
Tileset depictions are derived only from publicly available data. Warframe and all related assets are the property of Digital Extremes. This is a non-commercial fan made project, not affiliated with or endorsed by Digital Extremes.

Controls
Callisto, Sinai, Io
🔻Difficulty: Callisto:Hard, Sinai/Io:Very Hard
- Every time someone loots the starting area past the big door at the top of the stairs, it breaks the rest of the spawns for a noticeable amount of time. So either do NOT loot the starting section vitus at all, or only loot if the team all agrees to not loot unless there are 3 or more drops in there.
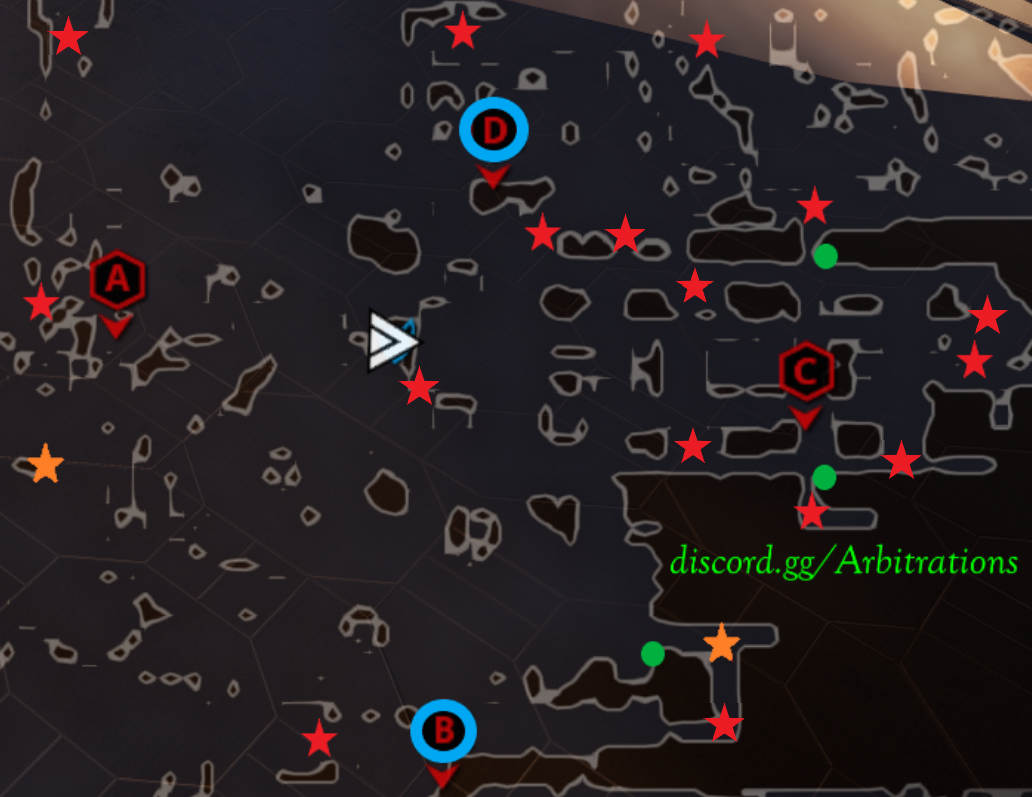
- Camp location for Callisto either C or B. Sinai/Io either top of zipline or middle under generator.
- Callisto expected VE 800-1000, Sinai/Io expected VE 400-500
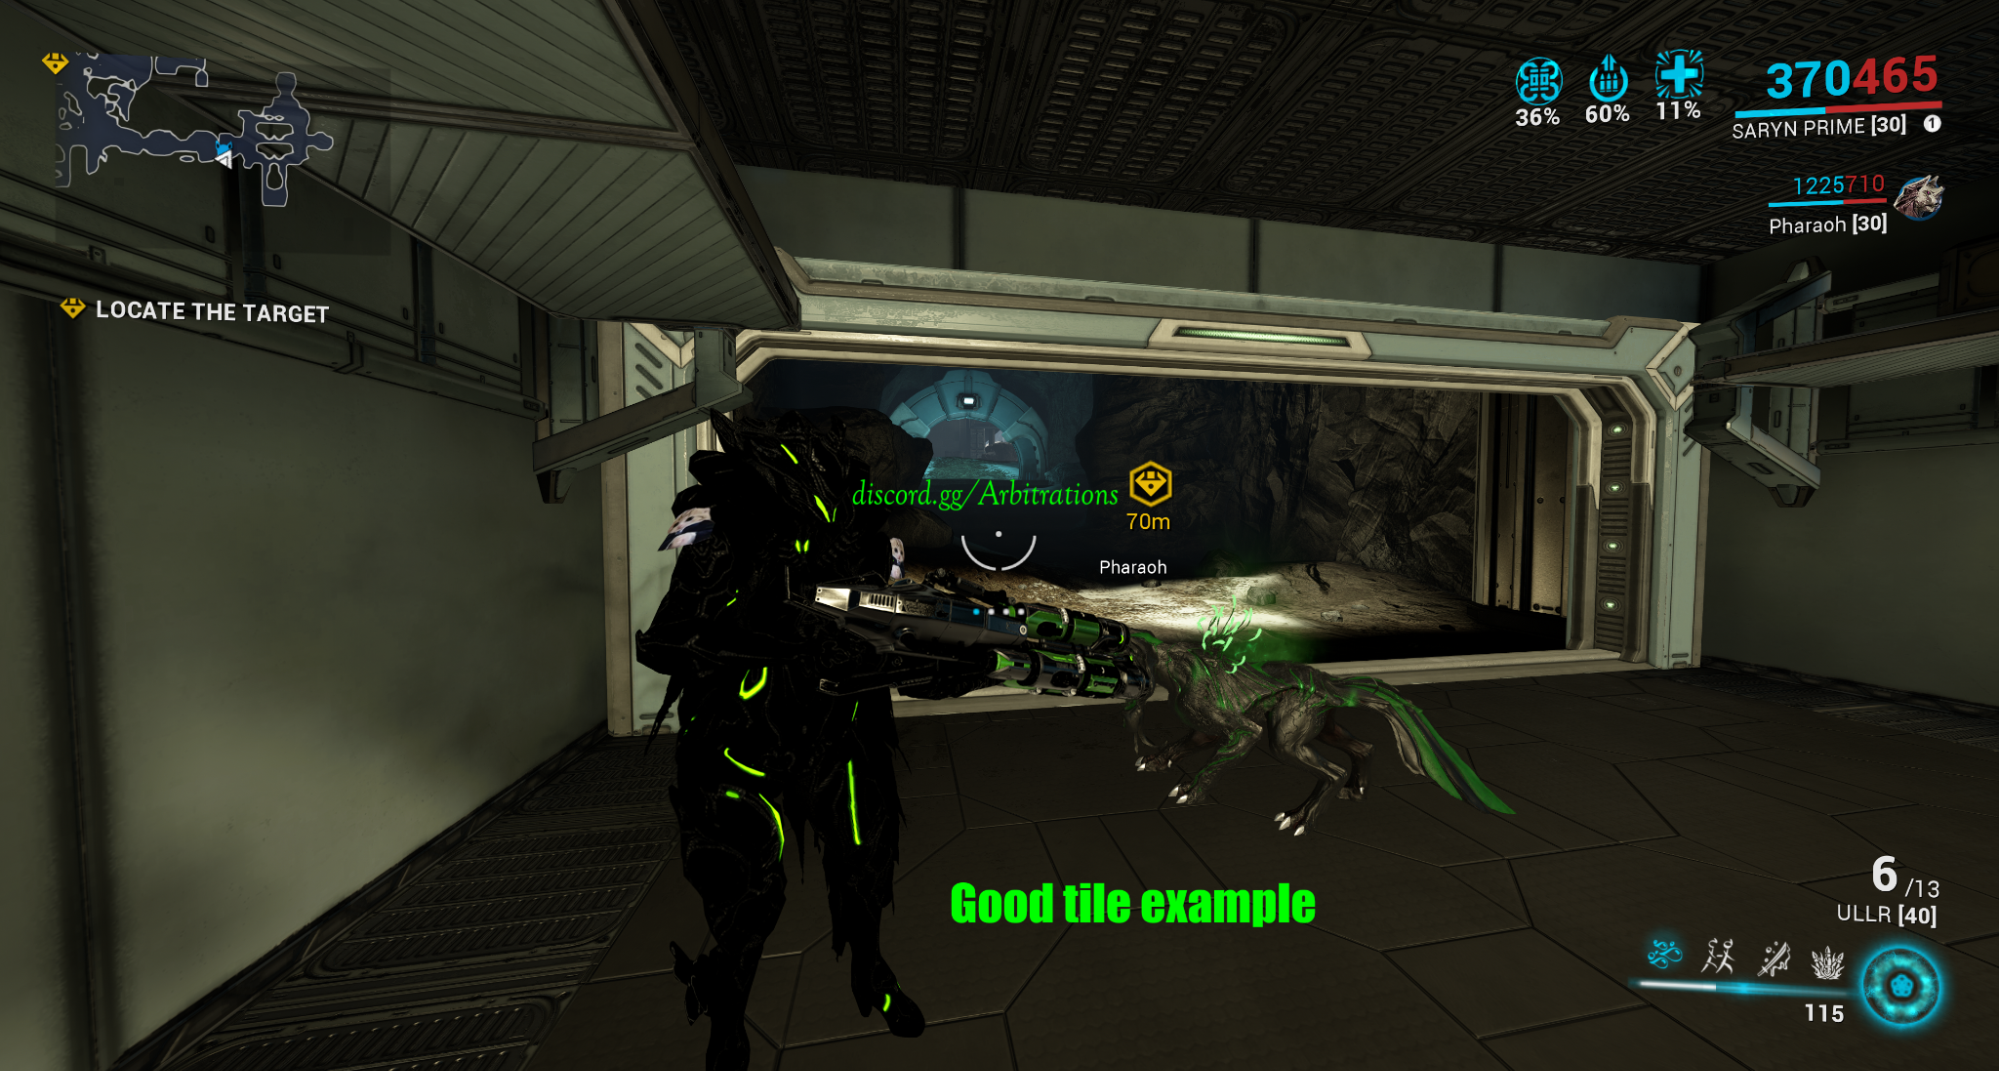
- There are 4 different starting tilesets to roll, look for the two short hallway one depicted below.
- Avoid gas on these tiles.
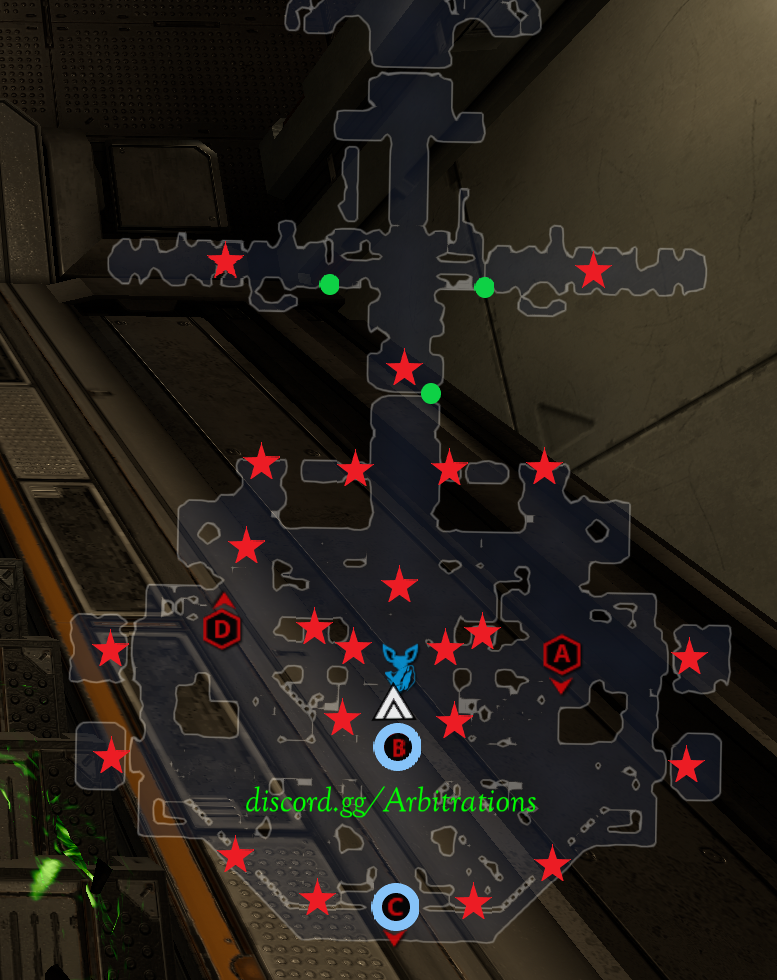
Umbriel, Stephano
🔻Difficulty: Umbriel:Hard, Stephano:Easy
- Umbriel tileset changed, current variant has certain tunnels closed off and vitus drops in places where it cannot be collected.
- Expected VE for Umbriel 400-700, Stephano 450-550.
- Roll for cave network tile for Umbriel, and the sealab tile for Stephano.
- Avoid gas on these tiles.
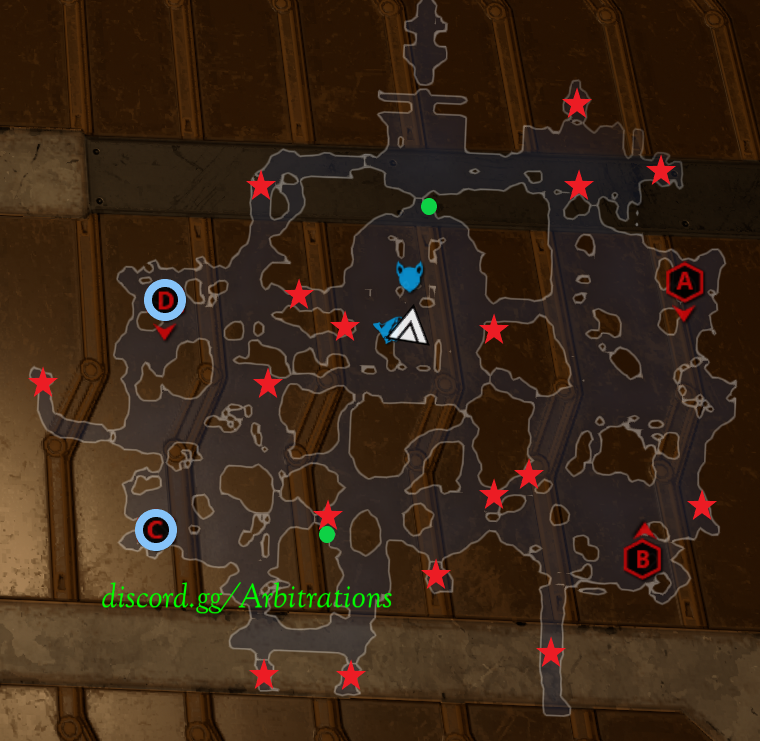
Cytherean, Xini, Gulliver, Romula, Proteus
🔻Difficulty: Very Hard
- Expected VE for Cytherean and Xini (interception) 800-1000,
- Gas tends to be suboptimal in interception because it causes spawn delay but due to the high density of spawns it is fine for a newer / less experienced player to play gas. Boar host is highly recommended as it is easier to hit spawns after the corpus filters out of the spawns.
- Expected VE for Gulliver, Romula and Proteus (defense) 400-500.
- Standard or Gas comp is fine. It is one of if not the hardest defense tile and takes a lot of practice in order to clear at a good pace. Recommend Boar host for ease of clearing as enemies will be running around more.
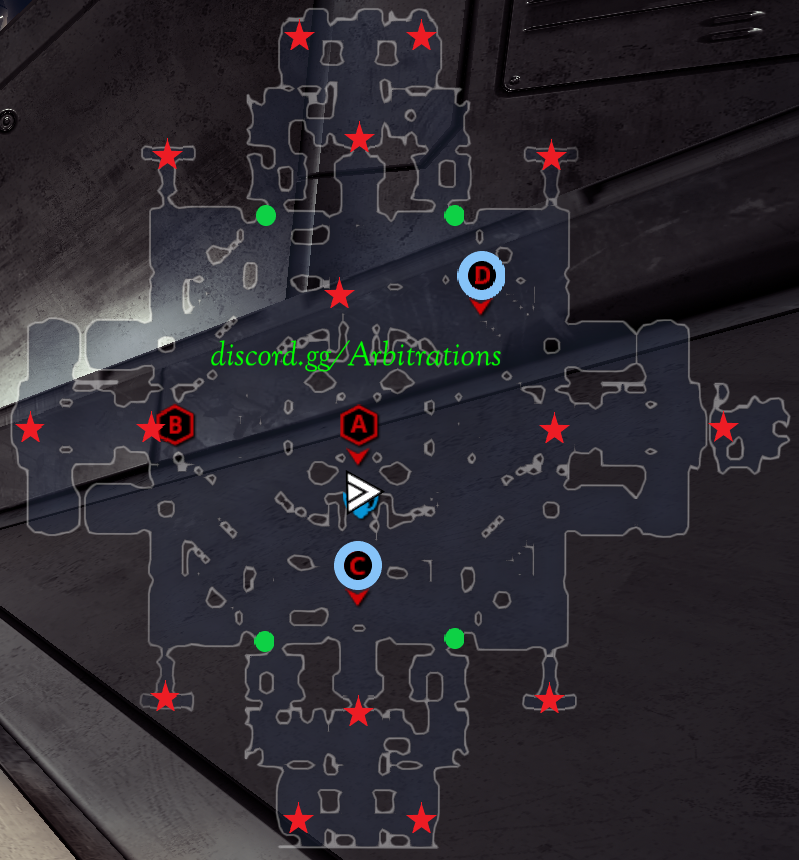
Alator, Kadesh, Spear
🔻Difficulty: Hard
- Expected VE for Alator 800-1000. Expected VE for Kadesh or Spear 450-550.
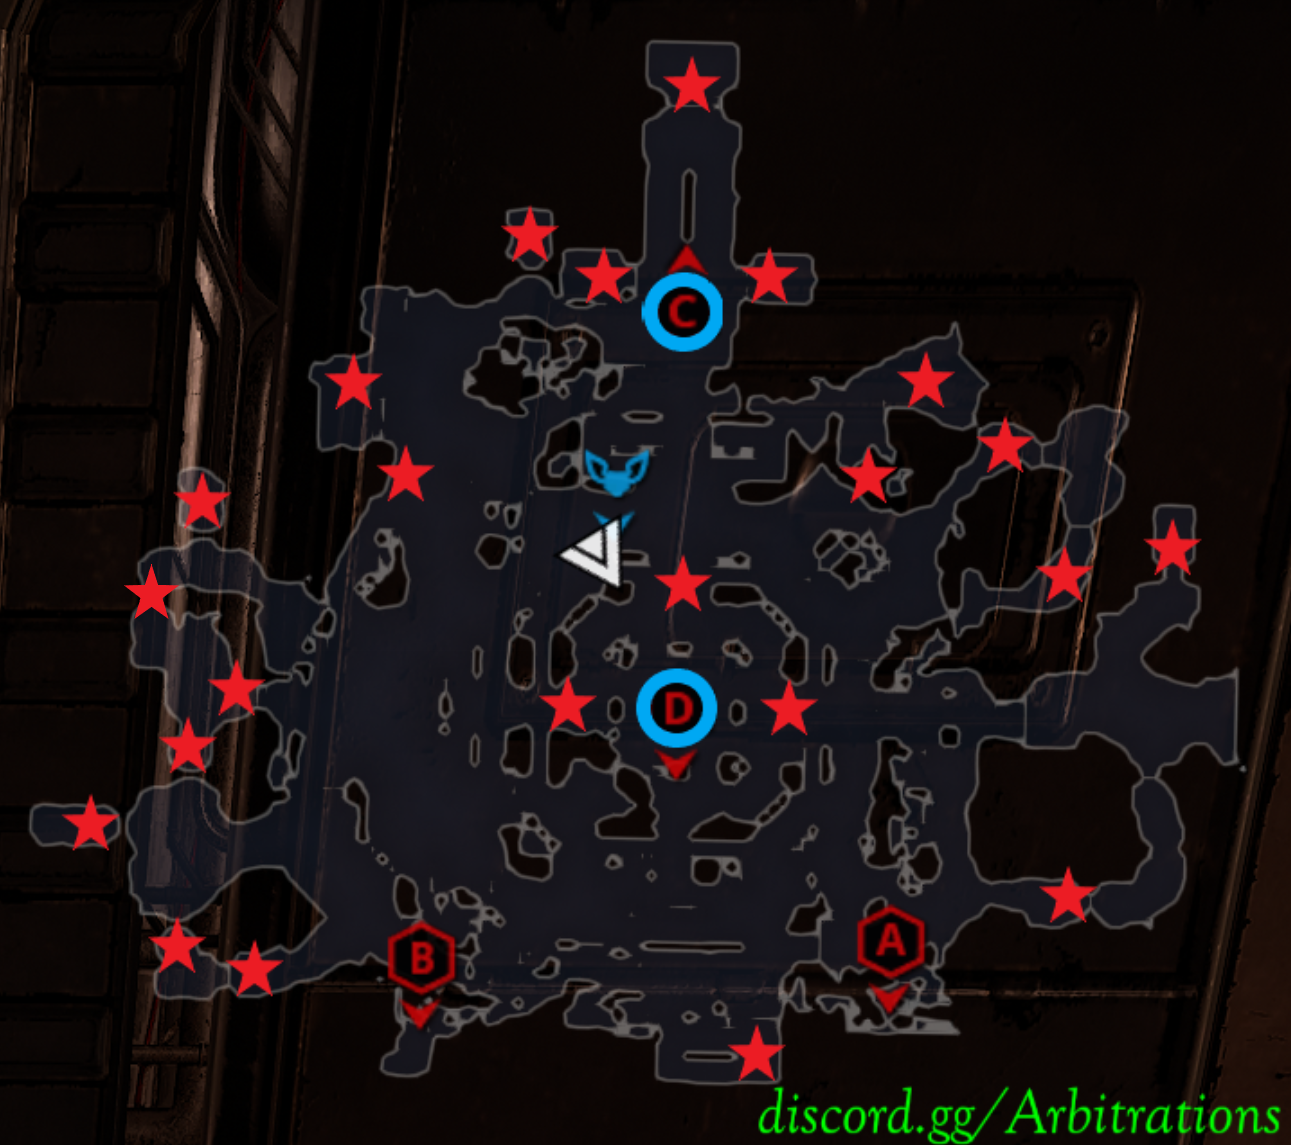
- Camp location can be either C or D point, I recommend D point.
- Kadesh and Spear are the defense variants of this tile, Kadesh is infested and more manageable. Spear is grineer and they can overwhelm you very quickly, and defense operative is highly likely to die.
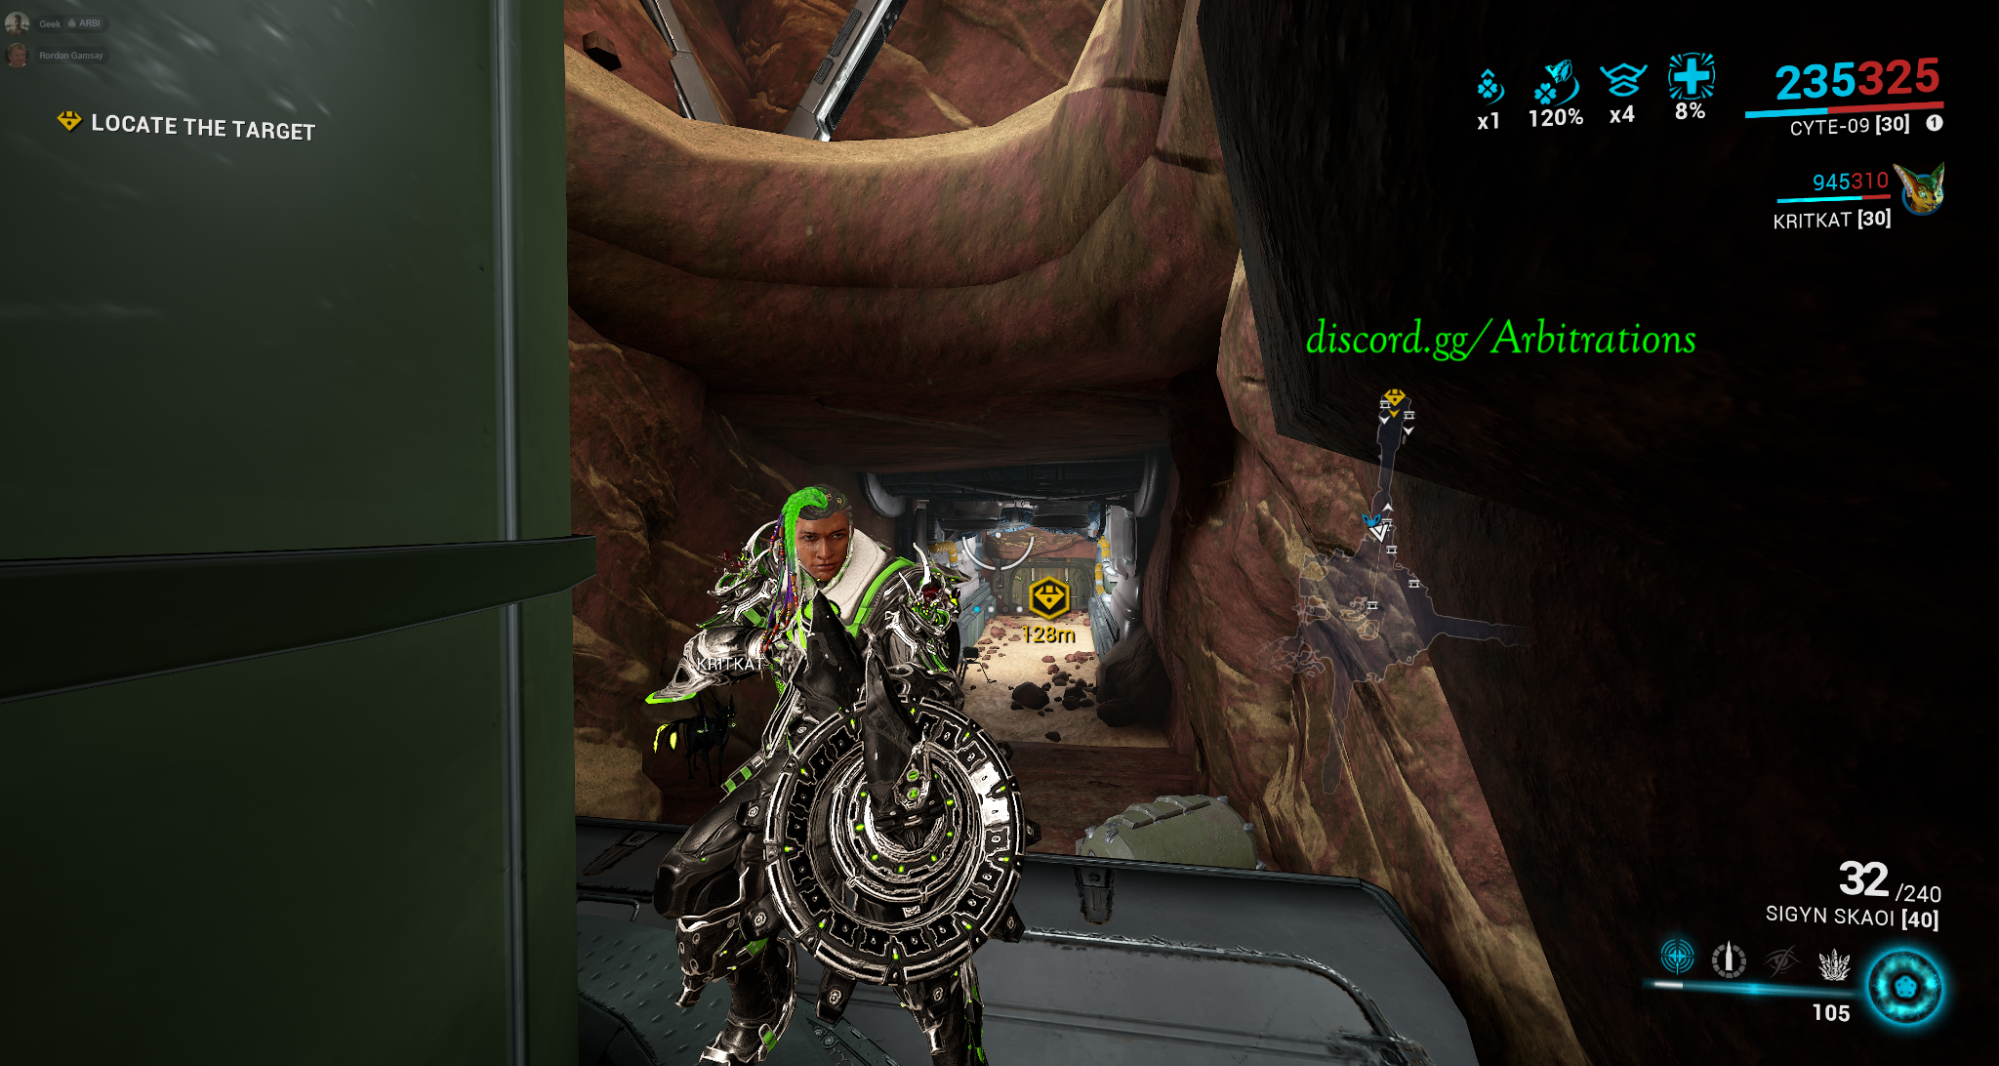
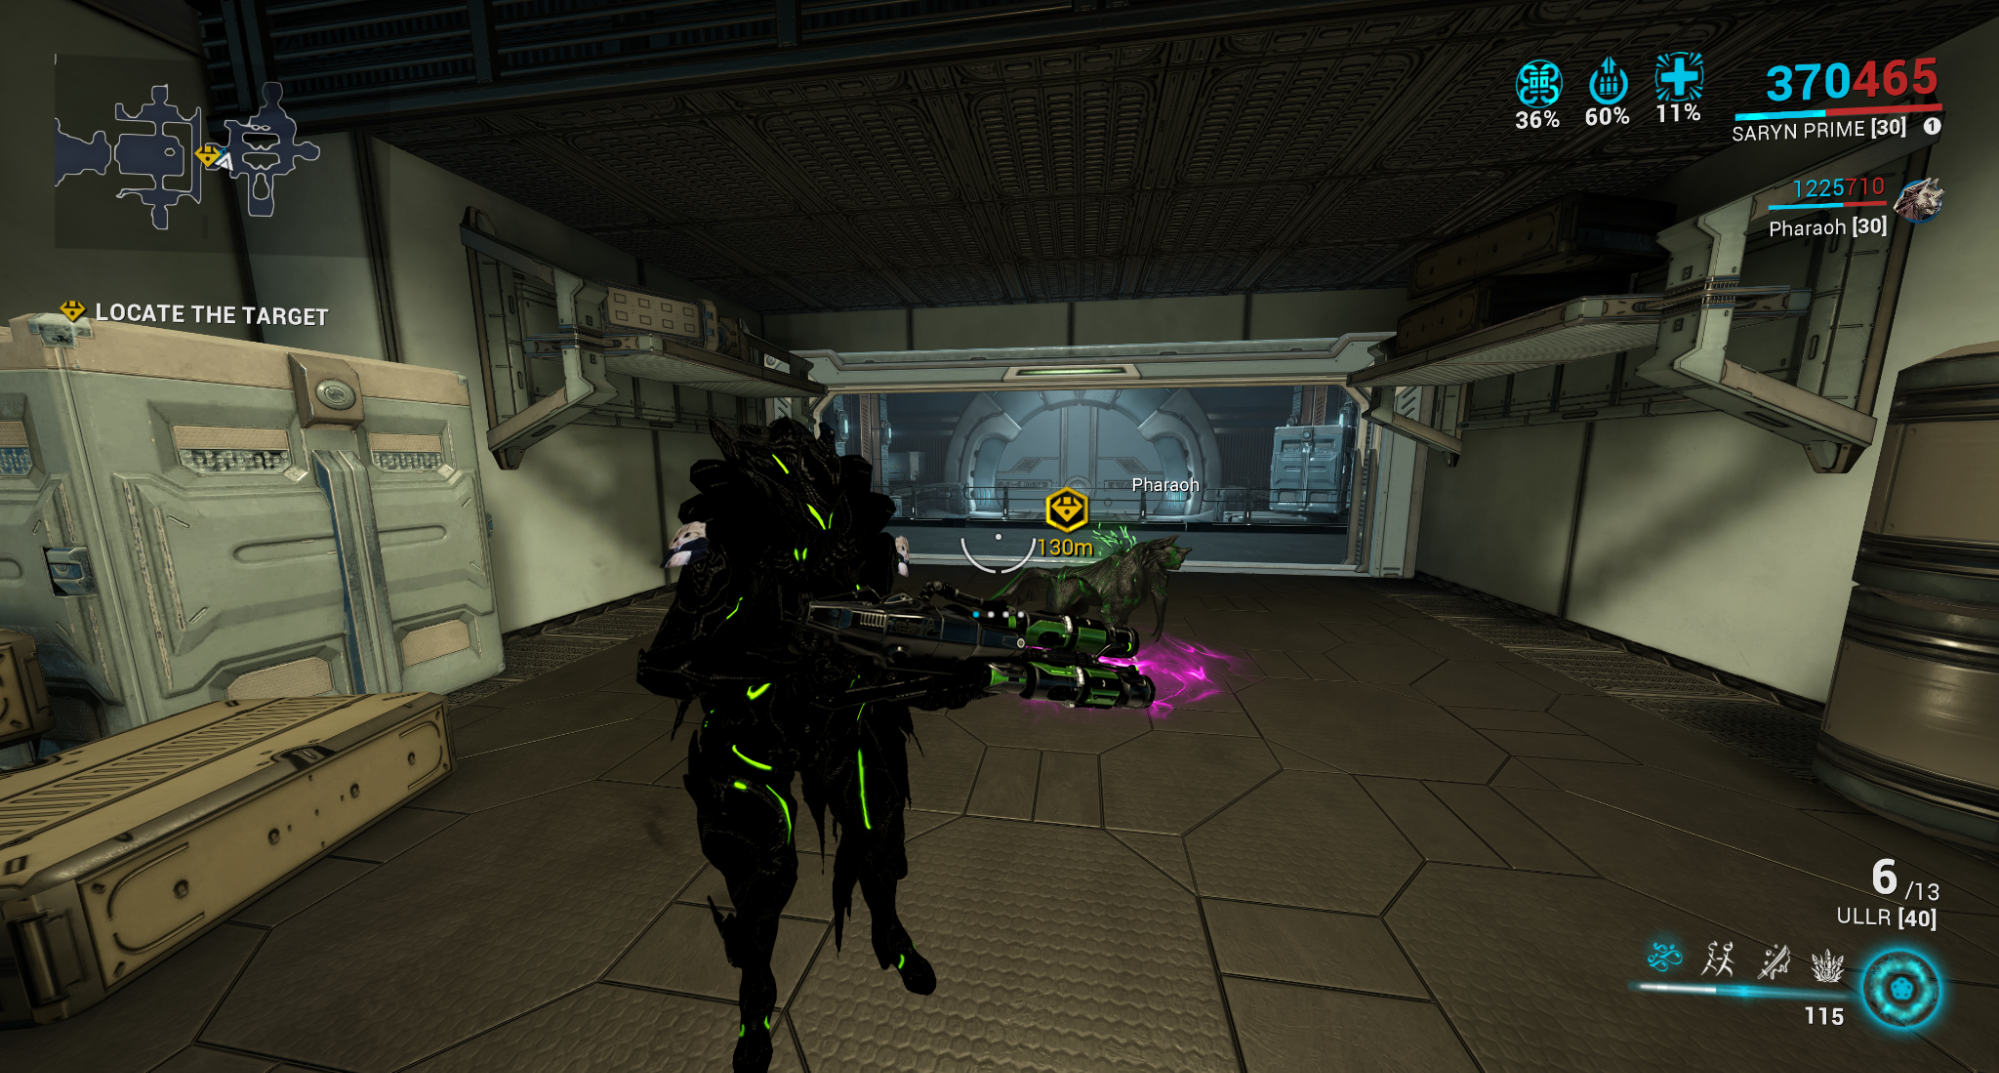
- Spear and Kadesh can roll 2 different starting rooms, look for this specific one so that you do not get the random spawn 130m away from the camp area. Alator does not have this issue.
- Avoid gas on these tiles.
- https://www.youtube.com/watch?v=2AxLdauS7JY
Tyana Pass
🔻Difficulty: Hard
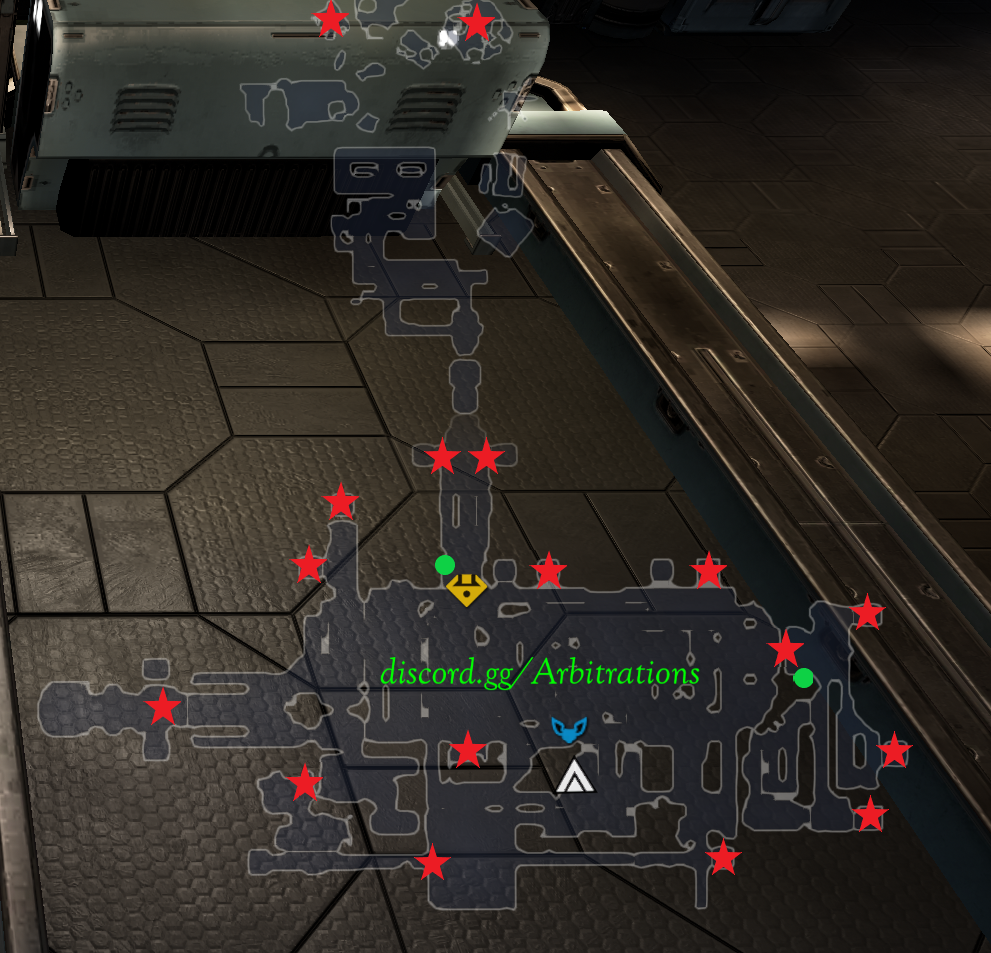
- Expected VE is 700-1000.
- Two spawns in the void area between tiles, best thing to do is take turns dropping a Kuva Zarr on call crewmate and make them hold position in the void platform between wave changes.
- Every time someone loots the void area, it breaks the rest of the spawns for a noticeable amount of time. So either do NOT loot the void section vitus at all, or only loot if the team all agrees to not loot unless there are 3 or more drops in there.
- When prebuffing, set up buffed motes on both sides of the map, to avoid DPS having to run back to the prebuffed set of motes if they lose their motes.
- Gas comp is ideal for Tyana Pass.
Munio
🔻Difficulty: Hard
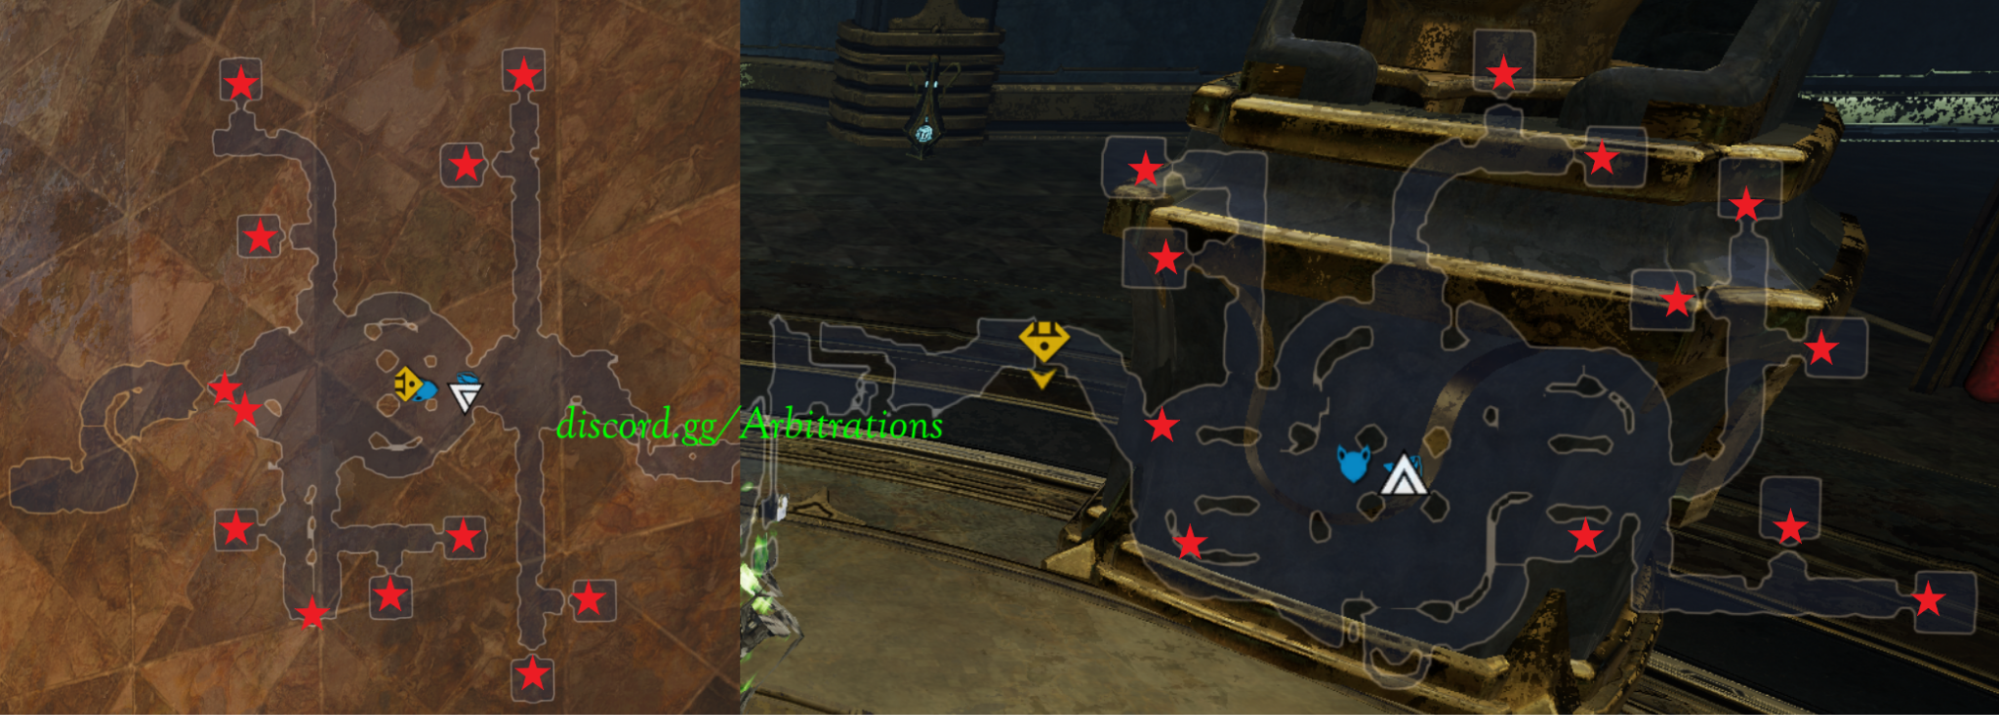
- Expected VE is 600-900.
- When prebuffing, set up buffed motes on both sides of the map, to avoid DPS having to run back to the prebuffed set of motes if they lose their motes.
- Collect VE fast on this tile as it despawns very quickly due to the amount of drops.
- Standard setup and or gas is fine.
Mithra, Taranis, Belenus
🔻Difficulty: Mithra:Easy, Taranis/Belenus:Medium
- Expected VE for Mithra 600-750, Expected VE for Taranis or Belenus is 450-550.
- Drops will NOT appear as they should on the map when you go to collect. Collecting is harder in comparison to the Mithra (interception) variant.
- You can set up camp either below the bridge or on top of it.
- Avoid gas on these tiles.
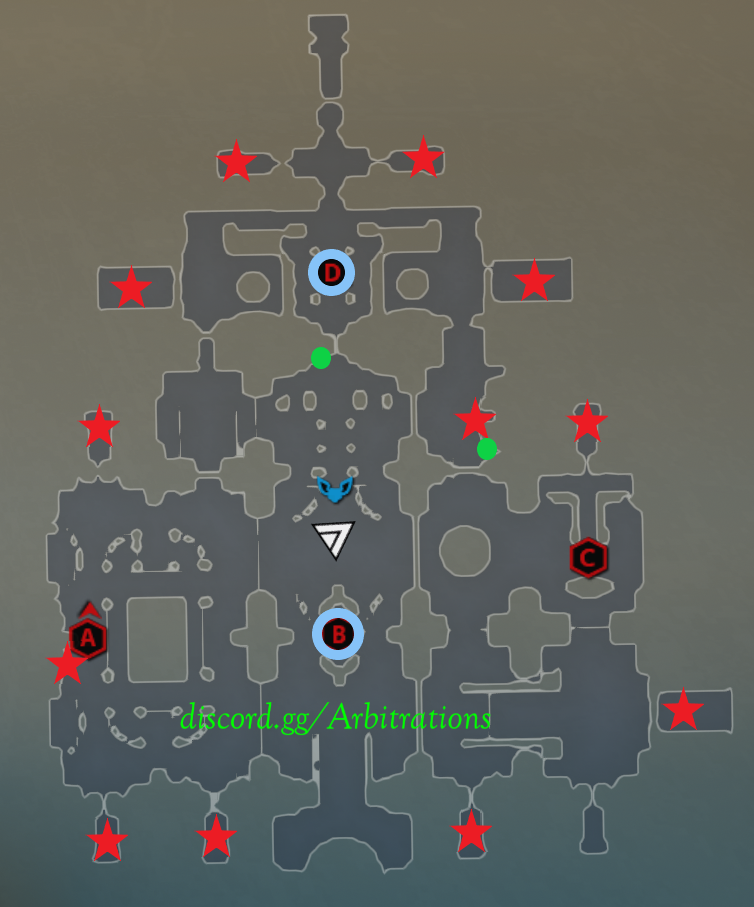
Casta, Seimeni, Cinxia
🔻Difficulty: Easy
- Expected VE on Cinxia 600-800, Expected VE on Casta or Seimeni is 450-550.
- There is a 50/50 chance the tile has rain each time you start the mission.
- Avoid gas on these tiles.
- https://www.youtube.com/watch?v=FOCBQu6UPQU
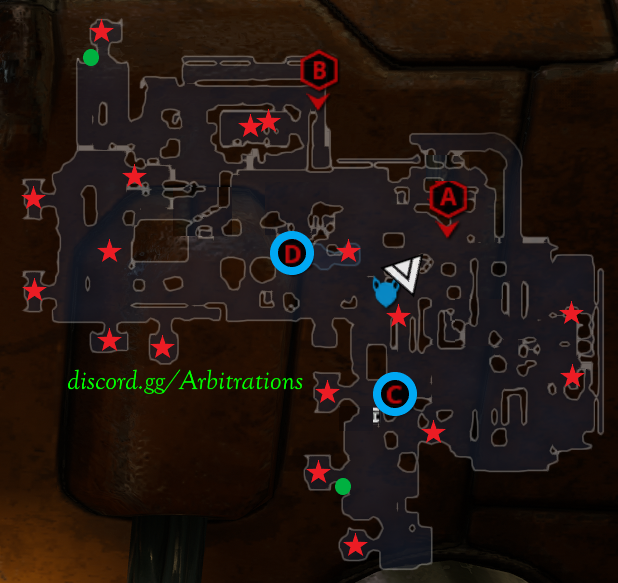
Hydron, Helene, Odin
🔻Difficulty: Easy
- Expected VE for Odin 500-700, Expected VE for Hydron or Helene is 400-550.
- This is absolutely the easiest tile to learn how to play Cyte on. All of the spawns are on roughly the same level/plane and are easy to get the hang of.
- Loot fast and as soon as Vitus Spawns, delay kills: delaying kills involves waiting for the entire spawn to spawn in, the most simple way to do this on Odin is to wait until the next spawn starts spawning and then shoot the previous spawn if done correctly your saturation should be around 13-14%, requires both dps to delay.
- If you are a newer player it is easier to run boar on this tile.
- Avoid gas on these tiles.
- https://www.youtube.com/watch?v=AL0in8XSot4
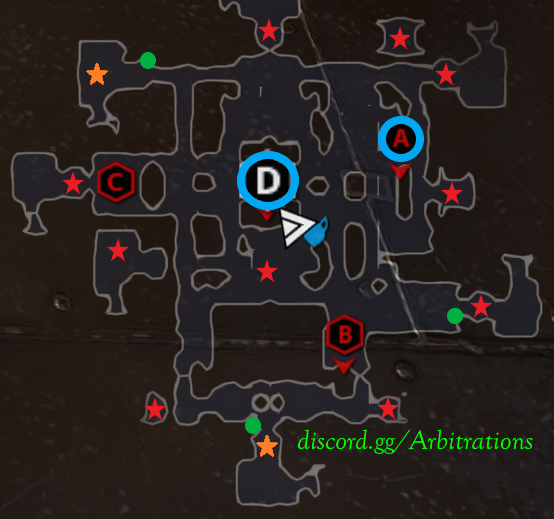
Sechura, Tessera, Outer Terminus, Cerberus
🔻Difficulty: Easy
- Expected VE is 450-550.
- Be careful when looting inside the top area spawns, if the operative follows you in there, he's quite vulnerable in tight quarters and active spawns.
- A corpus ship will spawn every few waves behind the mountain, which cyte can easily clear. Drones can spawn on that ship, and vitus they drop will appear on the overhanging platform.
- Cerberus cannot roll the small tile, only the other two.
- Avoid gas on these tiles.
- https://www.youtube.com/watch?v=Gj_VKXuPc6o
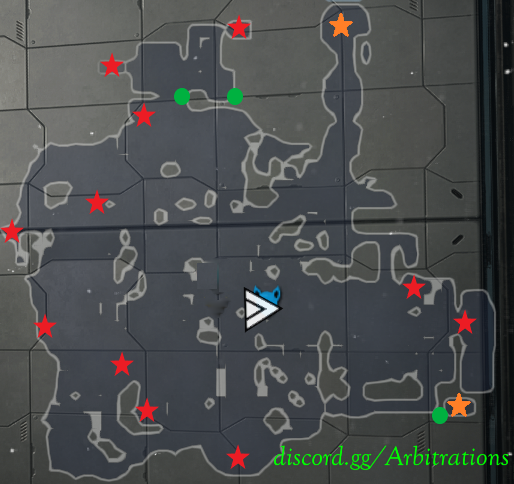
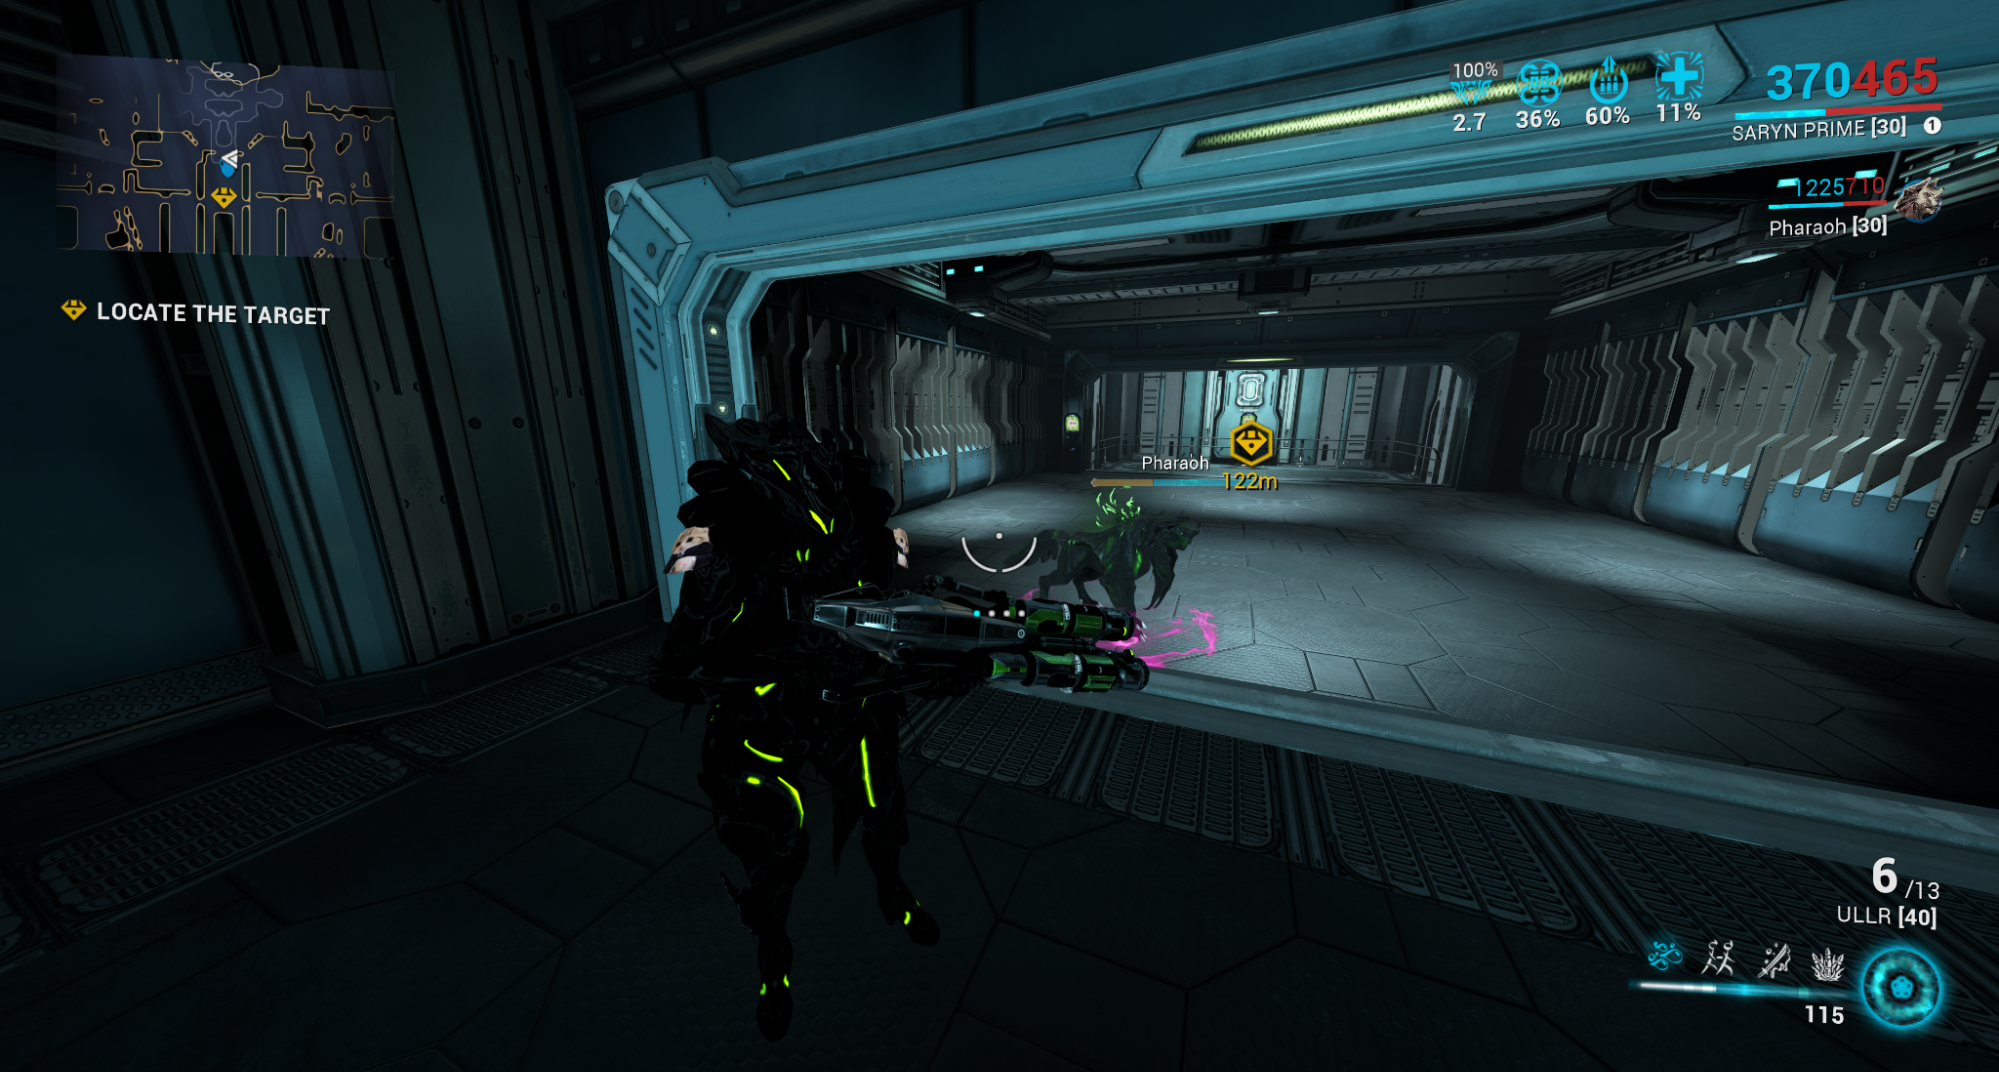
Look for the below tile out of the 3 possible for this node:
Ose, Paimon, Larzac
🔻Difficulty: Easy
- Expected VE for Ose 600-800, Expected VE for Paimon or Larzac is 450-550.
- A corpus ship will spawn every few waves behind the mountain, which cyte can easily clear. Drones can spawn on that ship, and vitus they drop will appear near the camp pillar area.
- Avoid gas on these tiles.
- https://www.youtube.com/watch?v=ErfZb69yjhQ
Rhea, Larezzz, Sangeru
🔻Difficulty: Very Easy
- Expected VE is 550-625.
- This tileset only really has 6 active spawns, so the defense missions take much longer for 102w. Around 1 hour 20 minutes minimum usually. Looting faster helps.
- Avoid gas on these tiles.
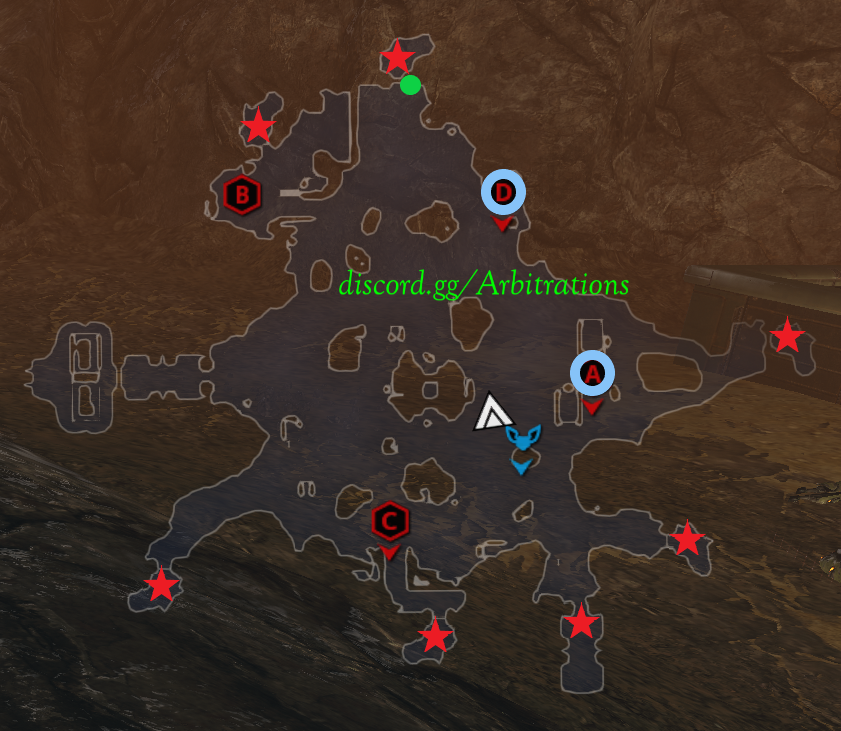
Akkad, Kala-Azar
🔻Difficulty: Easy
- Expected VE is 450-550.
- Loot despawns really fast due to sheer number of drops from infested, loot quickly. Even worse if someone has a Mod drop chance booster.
- Avoid gas on these tiles.
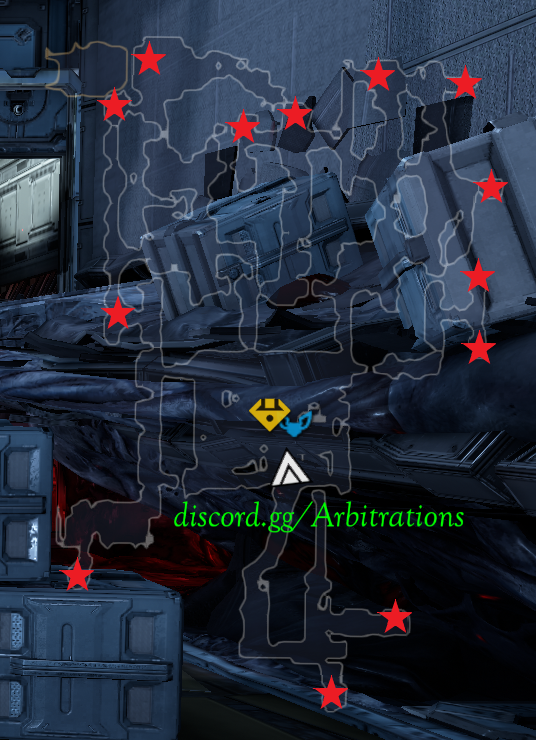
Coba, Lith
🔻Difficulty: Hard
- Expected VE is 400-550.
- This tileset is massive, if you do embark upon it ensure you have plenty of parkour.
- Avoid gas on these tiles.
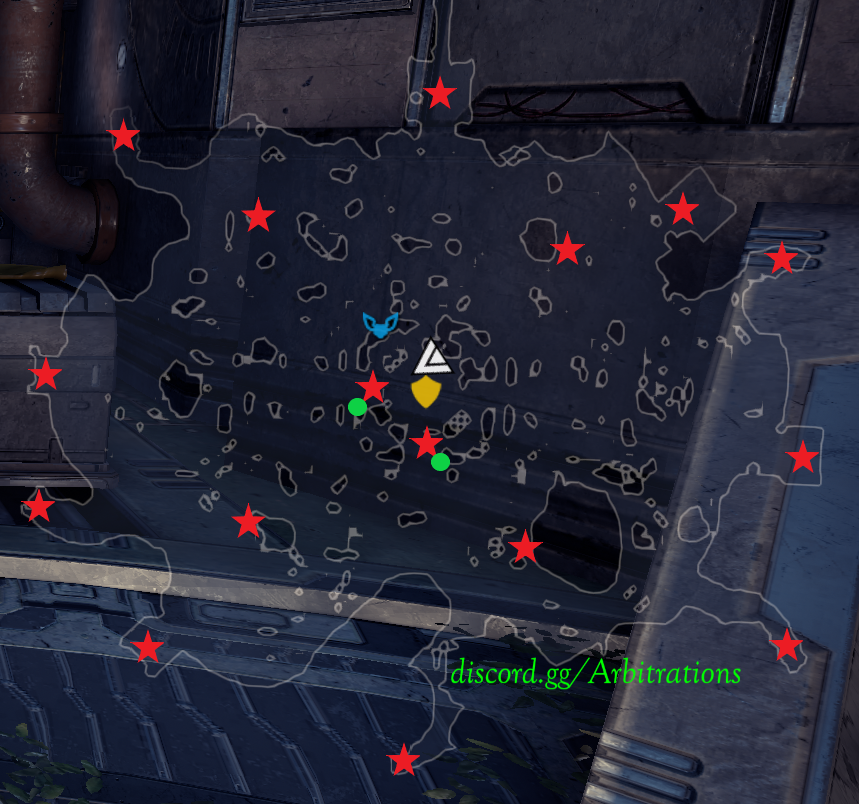
Berehynia
🔻Difficulty: Easy
- Expected VE is 200-400.. Pretty awful considering it's an interception tileset..
Oestrus
🔻Difficulty: Hard
- Expected VE is 500-700.
- GAS IS IDEAL HERE DUE TO HIGH SPAWN RATES.
- Setup motes close to A point and make sure to keep A point alive. Have supports pickup batteries and press “x” when close to A to upkeep the points healthbar.
- Boar on host is recommended because infested spread out quickly when leaving spawn, spawn coverage is much harder on sobek.
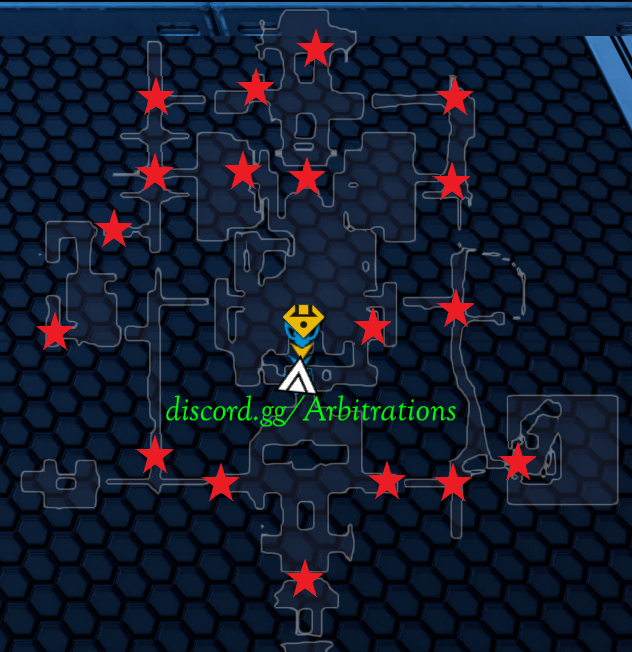
Gaia
🔻Difficulty: Easy
- Expected VE is 400-500.
- Loot fast and as soon as Vitus Spawns, delay kills: delaying kills involves waiting for the entire spawn to spawn in, the most simple way to do this is to wait until the next spawn starts spawning and then shoot the previous spawn if done correctly your saturation should be around 13-14%, requires both dps to delay.
- Avoid gas on this tile.
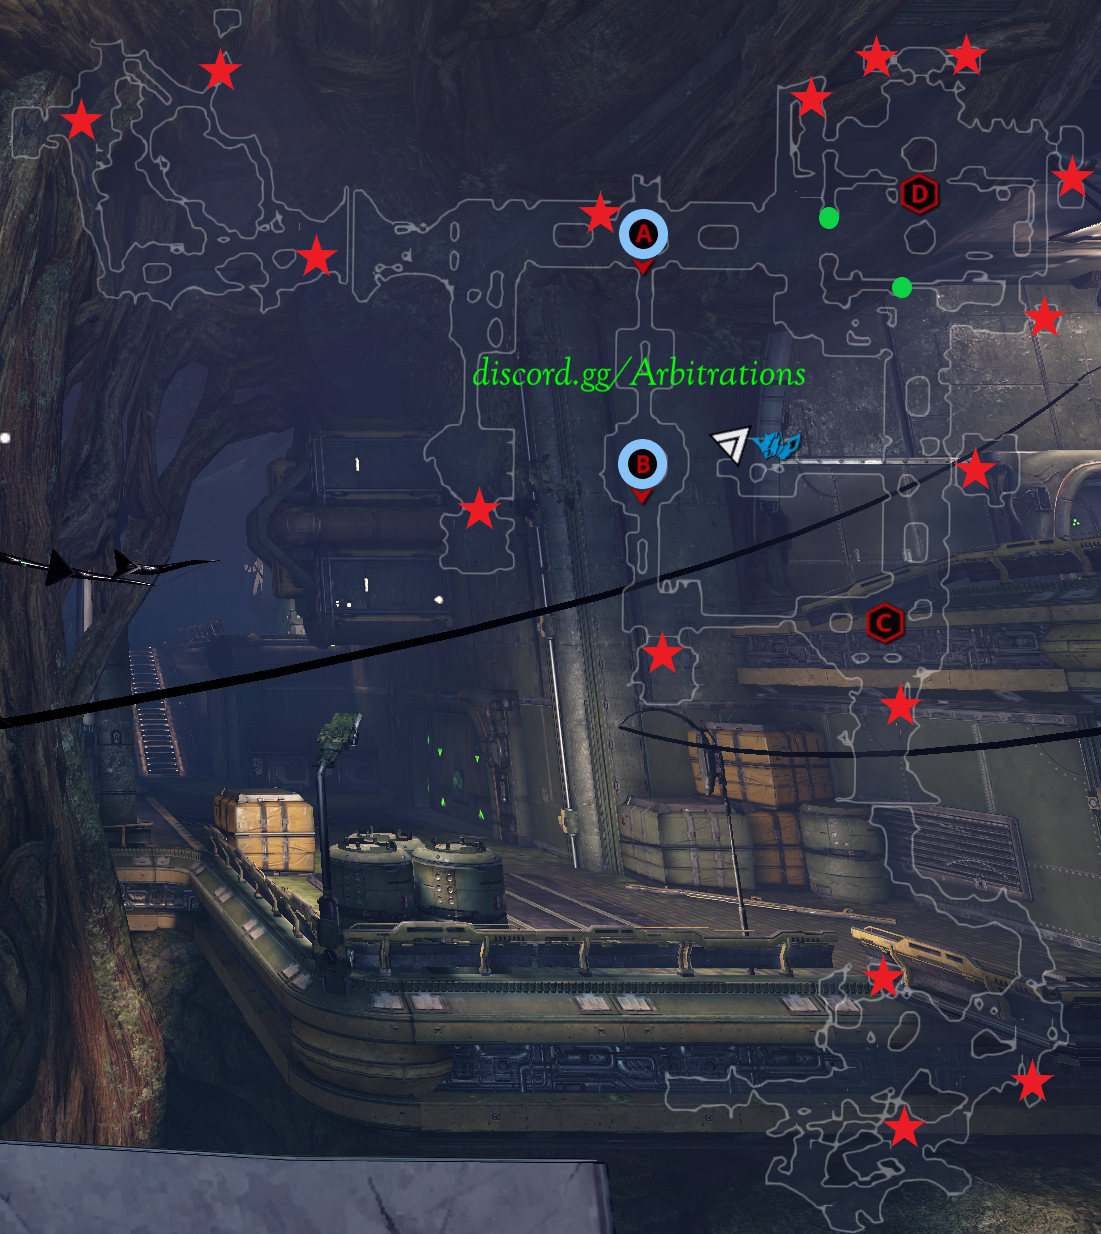
*The other tile, the iron wake variant has significantly more potential spawn points, still experimenting with ideal camp location to not block spawns and benefit from this. Still uncertain which tile is superior.
Hyf
🔻Difficulty: Easy
- Expected VE is 450-600.
- For this tile I strongly recommend everyone place down atomicycles and specters to keep the doors open to allow for better accessibility and prevent enemies getting stuck.
- Do not place atomicycle or specter at the 2nd floor middle doorway, if it dies/expires it will cause a hard crash and clients will disconnect from the host.
- Be careful of the right side spawns, it's a short run for them to get to the operative.
- Avoid gas it will make the mission take longer and will insta kill infested pods (infested pods give more drone spawns).
- If you are a newer player it is easier to run boar on this tile.
- https://www.youtube.com/watch?v=-HsabIutq14
- https://www.youtube.com/watch?v=oGZ3l39V16U
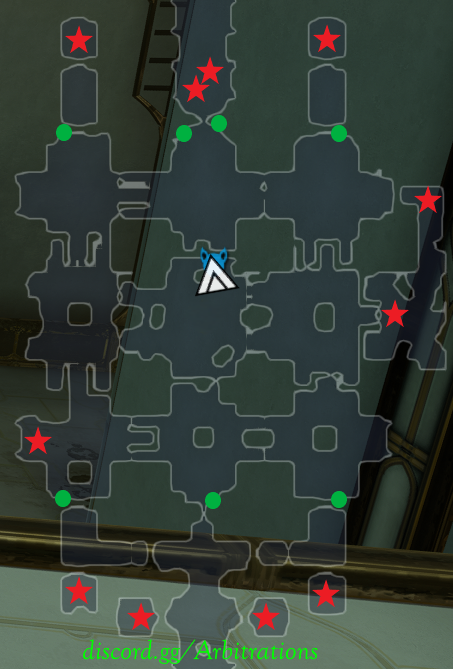
Stöfler
🔻Difficulty: Very Hard
- Expected VE is 400-500.
- The map changes twice, after the first two rounds. Setup prebuffed motes (1 health and 1 haste only) right outside of the middle ring area. Save 2 motes for middle zone and 2 motes for final zone at bottom.
- Bottom zone is where the majority of the mission will be spent, spawns are very spread out and loot despawns VERY fast on this tileset for some reason. So, loot quickly.
- Avoid gas on this tile.